Sunday, January 3, 2016

You Warm My Heart

Good afternoon happy stampers!!  Thanks for stopping by today, I am so excited to be participating in a New Catalog Countdown with SSInkspiration.   Today is the third day of the countdown and we have many sneak peek samples for you HERE!
 
I had to get a little bit creative with today's post as I don't have much from the Love Blossom's suite...yet!  I do have the pretty DSP, which I was able to use for a pretty background for and old favorite, Sheltering Tree.
 
Supplies Used:
Paper ~ Crumb Cake, Rose Red, Blushing Bride, Whisper White, Love Blossoms DSP Stack
Ink ~ Crumb Cake, Blushing Bride, Rose Red
Stamp Set ~ Sheltering Tree
Other Supplies ~ Linen Thread, Mini Treat Bag (small hearts), Itty Bitty Accents Punch Pack (heart), Itty Bitty Accents Epoxy Stickers
 
This DSP makes for a very pretty background for a simply stamped image.  I love it when the DSP does that for a card!
 
I'll be back again tomorrow with another sneak peek as we continue the 2016 Occasions Catalog countdown.
 
Happy Stamping!

Saturday, January 2, 2016

The Number of Years...

Good afternoon happy stamper!!  Thanks for stopping by today, I am so excited to be participating in a New Catalog Countdown with SSInkspiration.   Today is the second day of the countdown and we have many sneak peek samples for you HERE!
 
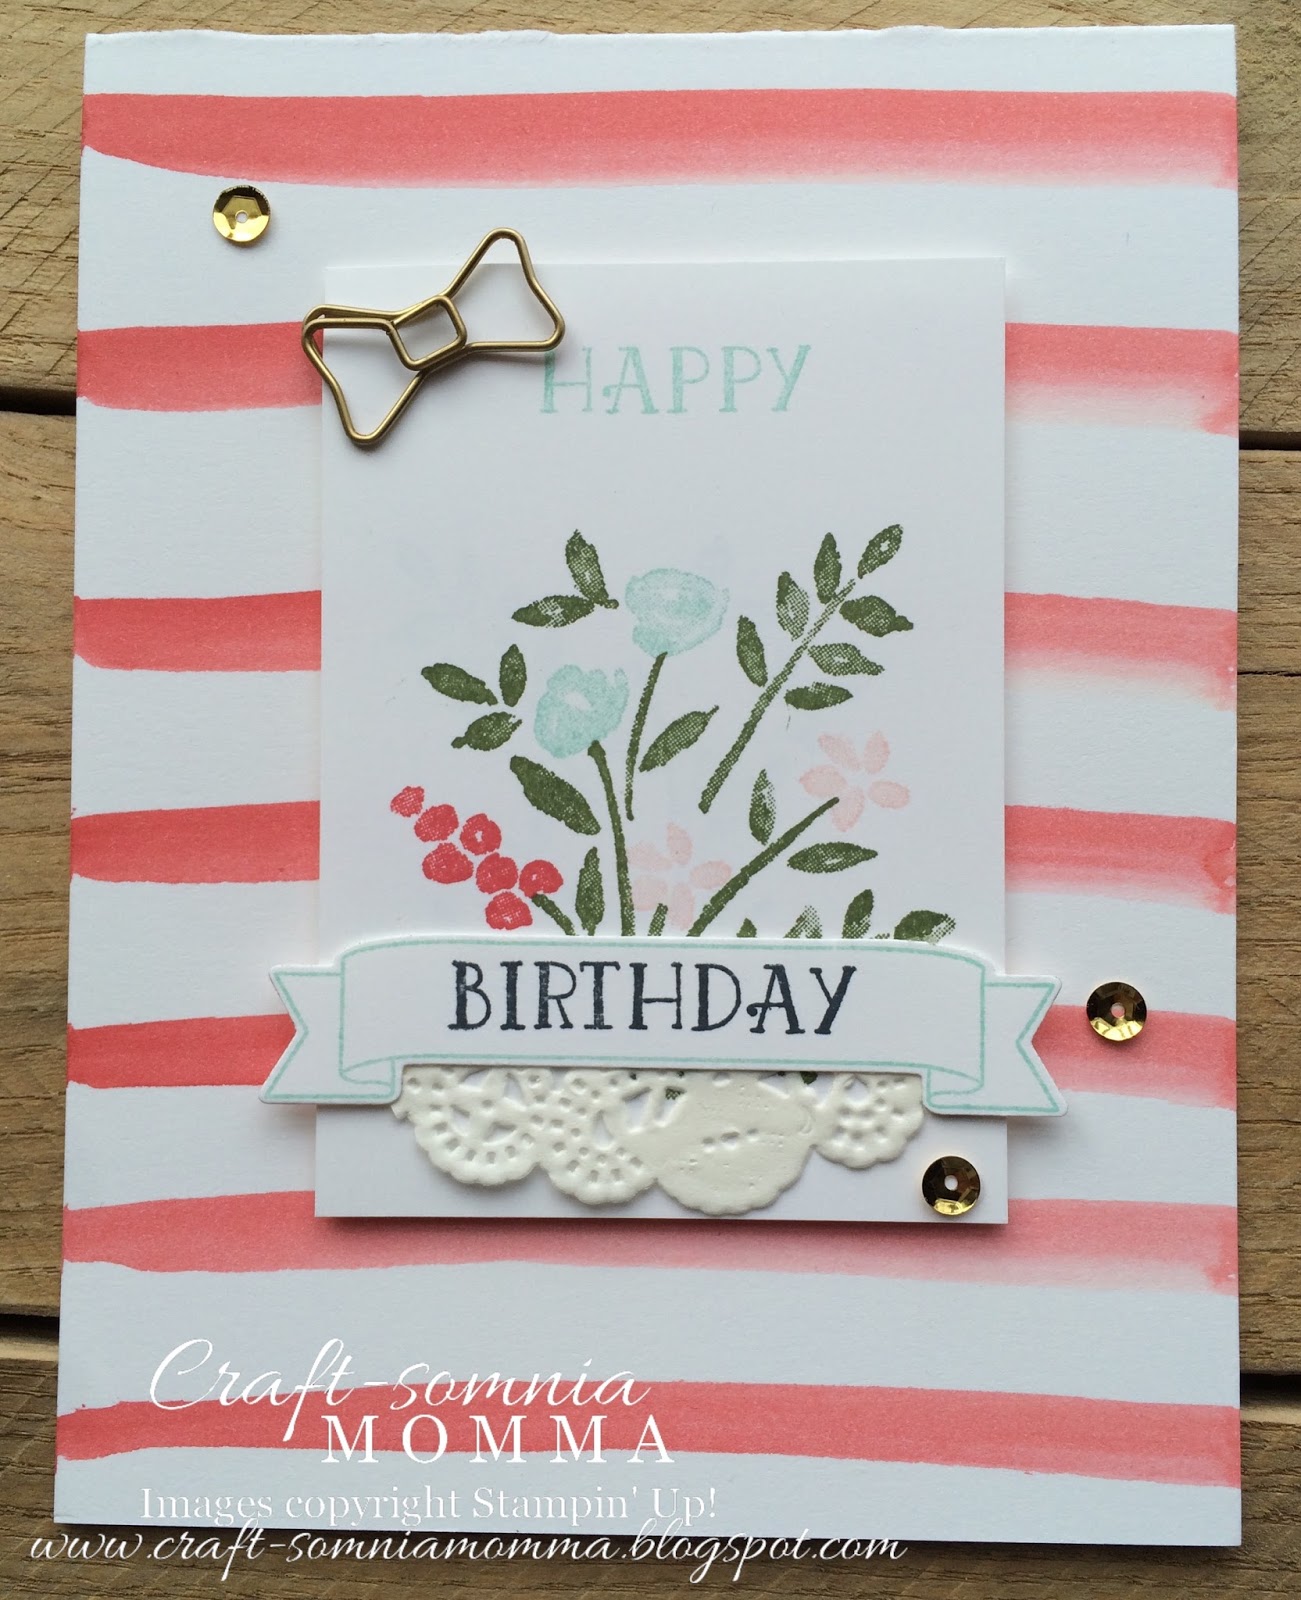
I am not much of a frilly-pink-loving-ribbons-and-bows kind of girl, but I DO love the colors and fun embellishments in the Birthday Boquet suite.  I ordered the Birthday Bouquet DSP, but Mr. UPS hasn't delivered it yet.  So what do you do when you don't have any DSP?  Make you own, of course! 
With a few Aqua Painter brushstrokes of Watermelon Wonder on some Whisper White cardstock, I had the perfect background!
Supplies Used:
Paper ~ Whisper White
Ink ~ Watermelon Wonder, Mossy Meadow, Pool Party, Blushing Bride, Basic Black
Stamp Sets ~ Number of Years
Other Supplies ~ Tea Lace Paper Doilies, Metallic Sequins, Large Number Framelits, Bow Paper Clips

Sweet and simple...I love this, even with all of the pink and lace!
 
Don't forget to stop back by again tomorrow for another sneak peak of what's to come!
 
Happy Stamping!


Friday, January 1, 2016

It's My Party...

...and I'll make a wish if I want to!
 
Good afternoon happy stampers!!  Thanks for stopping by today, I am so excited to be participating in a New Catalog Countdown with SSInkspiration.   Today is the first day of the countdown and we have many sneak peek samples for you HERE!
 
To kick things off, I have a simple, yet festive card to share with you today using items from the It's My Party suite in the 2016 Occasions catalog.  This is first suite you will see when you open the catalog and it is one of my favorites!  I love the colors and the fun birthday images..and the adorable little punches....LOVE!!


Supplies Used:
Paper ~ Whisper White
Ink ~ Mint Macaron, Melon Mambo, Crushed Curry, Basic Black
Stamp Set ~ Party Wishes
Other Supplies ~ Metallic Silver Thread, Metallic Sequins, Party Punch Pack, It's My Party Designer Washi Tape
 
The only thing that would make this suite even better is if there were some coordinating framelits for the Party Wishes Stamp set, but fussy cutting this cake was a piece of....cake!  And the candles were a breeze to punch out with the Party Punch Pack!
 
Thanks for stopping by for day one of the catalog kick off!  Be sure to check back over the next few days for some more sneak peeks and don't forget to see what all of our designers over at SSINK have created too!
 
Happy Stamping!

Wildflower Thank You

 I'm back with my second post of the New Year! 
 
With the craziness of the holidays behind us, it's time to crank out the Thank You cards to send out to our family and friends to thank them for all of the cherished gifts we were given this Christmas.  The girls over at Stylin' Stampin' INKspiration are working on their Thank You cards too...be sure to check them all out!
 
As you know, the 2016 Occasions Catalog and Sale-A-Bration are just days away from being launched, so I'm sharing a little sneak peek of what's to come in the SAB catalog. YOU can earn this paper and/or stamp set for FREE with every $50 purchase during Sale-A-Bration!
Supplies Used:
Paper ~ Whisper White, Hello Honey, Wildflower Fields DSP*
Ink ~ Basic Black, Old Olive, Calypso Coral, Blackberry Bliss, Hello Honey, VersaMark
Stamp Sets ~ Flowering Fields*, Something To Say
Other Supplies ~ Circle Framelits, Large Numbers Framelits**, Banner Punch, Calypso Coral Thick Bakers Twine, White Embossing Powder
*Sale-A-Bration items
**2016 Occasions Catalog item
 
I have one more post to share a bit later this morning, so be sure to check back for some another sneak peek!
 
Happy Stamping!


Super Hero Storybook

Happy New Year stampers!
 
I hope you had a fun time ringing in the New Year!  I actually made it until midnight this year...first time in MANY years!  My family joined some of our fire family and went to a hockey game...we all had so much fun!
 
We are kicking the New Year off with a FUN challenge over at Friday Mashup.  We are mashing things up with a Super Hero Storybook creation!
 
I'll admit, I was a little afraid of this challenge at first, but after a little thought, I was able to come up with a fun super hero birthday card, which my 4 year old has already claimed as his for his next birthday!
I've included a little photo tutorial below for how I designed the layout for this card, so be sure to scroll through to the end!
Supplies Used:
Paper ~ Whisper White, Real Red, Pacific Point
Ink ~ Basic Black, Crushed Curry, Real Red, Pacific Point
Stamp Sets ~ Calling All Heroes, B.Y.O.p
Other Supplies ~ Circle Punches, Itty Bitty Punch Pack (star), Word Bubble Framelits (retired), Square Framelits
 
Creating the storybook layout was a piece of cake using the Square Framelits and Magnetic Platform...take a look!
 
I lined the 1-1/2" square framelit up on the upper left corner of the card front and ran it through the Big Shot using the Magnetic Platform.  I repeated this step in the upper right corner, then moved the square framelit over to make a rectangle shape.
These steps were repeated at the bottom of the card front as well, cutting the square and rectangle shapes on opposing sides.
 
  Next, I cut the center rectangle using the same 1-1/2" Square Framelit.
 Once I had my storybook template cut, I placed it over the front of the card base and used a pencil to draw a few lines for guides for my stamping.


This card was a ton of fun to make!  I encourage you to join in the fun too!
 
Happy Stamping!